
ACM Add-Ons (Submariner)
After writing the article on VolSync, I wanted to follow-up with another add-on that is available in Advanced Cluster Management (ACM). This is Submariner. Here is a great description of Submariner right from its website
This article will serve a few purposes. The install process will be shown first and then a change will be made to the VolSync configuration that was discussed in my previous article. The specific change being made to VolSync is in regards to the fact that I had to install MetalLB Operator with the previous use-case and enable a LoadBalancer resource.
This is all good but let's assume you are limited on External IP addresses that can be assigned. With the MetalLB solution, each ReplicationDestination would need an ExternalIP resource. If your IP space is being managed by another team in your organization, getting these IPs may be a slow process. If your cluster is directly on the Internet (not typical), you may need to purchase additional IPs.
Submariner eliminates this IP problem and also solves a lot of other issues as well.
The steps that will be followed in this article are based-on the following documentation:

Some prerequisites:
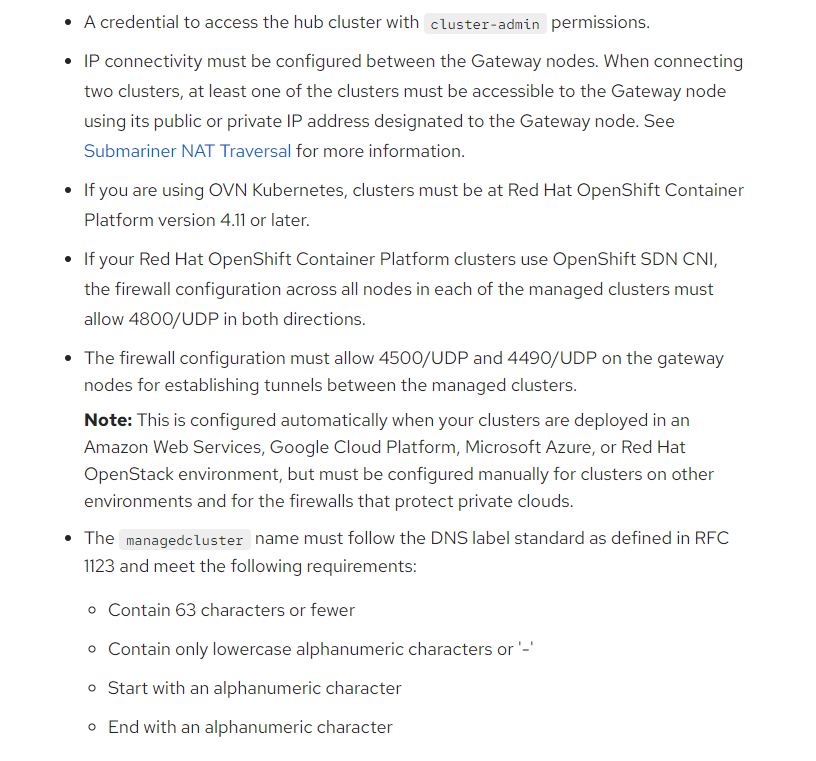
Since I'm running all SNO (bare-metal) clusters currently, the gateway node would need to be each SNO host. There is a site-to-site VPN that allows direct connectivity between each of the clusters. These clusters are based off of OCP 4.11 using OVNKubernetes.
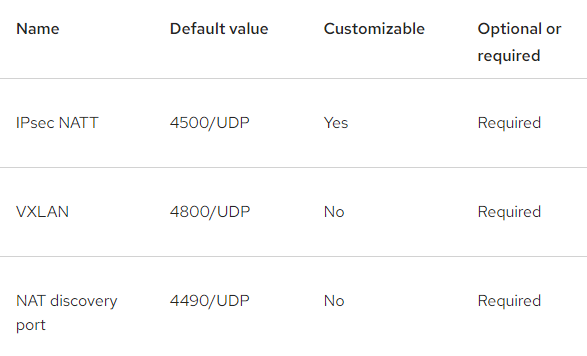
If there is a firewall between the clusters, some additional ports would need to be opened.
Open Ports:
Here is an outline of what will be covered
A. Installing Submariner Add-On to Spoke1/Spoke2 clusters
B. Enabling Service Discovery
C. Changing VolSync to use ClusterIP Instead of LoadBalancer
Installing Submariner Add-On to Spoke1/Spoke2 clusters
In this use-case Globalnet will be deployed. This is a requirement because I used the default settings for my Services/ClusterIPs on each of my clusters. The default setting is 172.30.0.0/16. A virtual network and NAT (provided by Globalnet) are used to allow the services on each cluster to talk.
More information on this concept is shown here
 The Submariner community
The YAML used below is also provided at my GitHub Repo
 kcalliga
- Let's create the ManagedClusterSet resource called submariner. Spoke1 and Spoke2 will become members of this. This will be run from the hub cluster.
apiVersion: cluster.open-cluster-management.io/v1beta2
kind: ManagedClusterSet
metadata:
name: submarineroc apply -f mcs-submariner.yaml2. Now create the broker configuration on hub.
apiVersion: submariner.io/v1alpha1
kind: Broker
metadata:
     name: submariner-broker
     namespace: submariner-broker
     labels:
         cluster.open-cluster-management.io/backup: submariner
spec:
globalnetEnabled: trueoc apply -f submariner-broker.yaml3. Label Spoke1 and Spoke2 so they are part of the submariner ManagedClusterSet that was created in step 1.
oc label managedclusters spoke1 "cluster.open-cluster-management.io/clusterset=submariner" --overwrite

oc label managedclusters spoke2 "cluster.open-cluster-management.io/clusterset=submariner" --overwrite
4. Create the submariner config for spoke1 and spoke2. This is also run from hub. The VXLAN driver seemed to work best in my use-case. I'm assuming this is in regards to an issue with double-encryption/encapsulation due to my site-to-site VPN.
apiVersion: submarineraddon.open-cluster-management.io/v1alpha1
kind: SubmarinerConfig
metadata:
    name: submariner
    namespace: spoke1
spec:
cableDriver: vxlanoc apply -f submariner-config-spoke1.yamlapiVersion: submarineraddon.open-cluster-management.io/v1alpha1
kind: SubmarinerConfig
metadata:
name: submariner
namespace: spoke2
spec:
cableDriver: vxlanoc apply -f submariner-config-spoke2.yaml5. Still on hub, create the submariner ManagedClusterAddon for spoke1 and spoke2.
apiVersion: addon.open-cluster-management.io/v1alpha1
kind: ManagedClusterAddOn
metadata:
     name: submariner
     namespace: spoke1
spec:
installNamespace: submariner-operatoroc apply -f mca-spoke1.yamlapiVersion: addon.open-cluster-management.io/v1alpha1
kind: ManagedClusterAddOn
metadata:
name: submariner
namespace: spoke2
spec:
installNamespace: submariner-operatoroc apply -f mca-spoke2.yaml6. After these 2 commands are run, let's check the status
To check that the ManagedClusterAddon was enabled
oc get ManagedClusterAddons -A|grep submarinerMake sure the output shows as true for submariner

Now, let's see if the appropriate workloads were enabed on spoke1 and spoke2 to support submariner.
oc -n spoke1 get managedclusteraddons submariner -oyamlWait a few minutes and look at the conditions
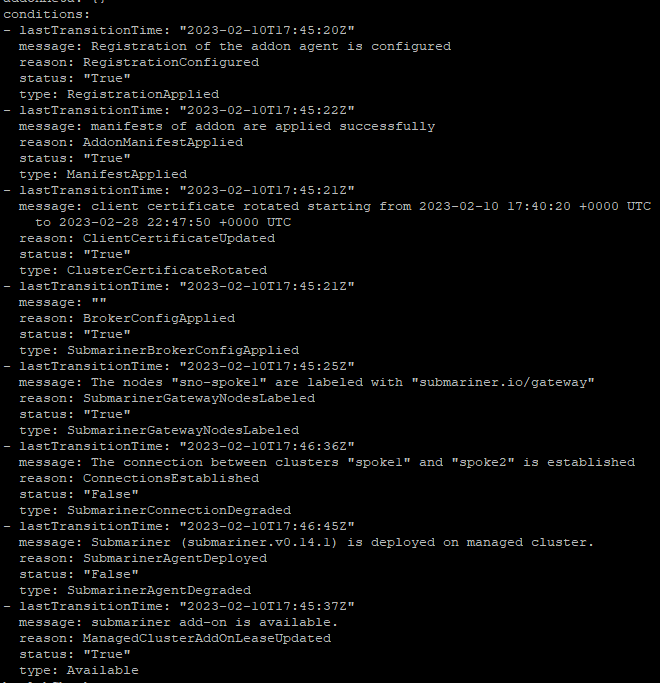
Ensure that the SubMarinerAgentDegraded shows False
Ensure that the SubMarinerConnectionDegraded shows False
Another way to check the status of this is by using the subctl utility.
To download this and run from your bastion/jump-host, you may need to do a few things. I'm copying this to /usr/local/bin
# Install podman if not already installed
yum install podman -y
# Login to Redhat registry
podman login registry.redhat.io
# Download image and extract tar.xz file to /tmp
oc image extract registry.redhat.io/rhacm2/subctl-rhel8:v0.14 --path="/dist/subctl-v0.14*-linux-amd64.tar.xz":/tmp/ --confirm
# Untar/gz the file
tar -C /tmp/ -xf /tmp/subctl-v0.14*-linux-amd64.tar.xz
# Copy subctl binary to /usr/local/bin and change permissions
install -m744 /tmp/subctl-v0.14*/subctl-v0.14*-linux-amd64 /usr/local/bin/subctl
From one of the clusters in the ManagedClusterSet (I picked spoke2), run the following command:
subctl show connections
This shows that sno-spoke1 is connected to spoke2
Enabling Service Discovery
In the documentation, the following example is provided to test is ServiceDiscovery is working.
- From spoke2
The following commands download an un-privileged nginx workload to the default project/namespace and exposes it as a service on port 8080.
oc -n default create deployment nginx --image=nginxinc/nginx-unprivileged:stable-alpine

oc -n default expose deployment nginx --port=8080
Enable ServiceDiscovery on nginx pod
subctl export service --namespace default nginx2. From spoke1, let's see if we can reach this service. We will create a nettest project and then a deployment
oc new project nettestkind: Deployment
apiVersion: apps/v1
metadata:
name: nettest
spec:
replicas: 1
selector:
matchLabels:
app: nettest
template:
metadata:
creationTimestamp: null
labels:
app: nettest
deploymentconfig: nettest
spec:
containers:
- name: nettest
image: quay.io/submariner/nettest
command:
- sleep
- infinity
resources: {}
terminationMessagePath: /dev/termination-log
terminationMessagePolicy: File
imagePullPolicy: Always
restartPolicy: Always
terminationGracePeriodSeconds: 30
dnsPolicy: ClusterFirst
securityContext: {}
schedulerName: default-scheduler
imagePullSecrets: []
strategy:
type: RollingUpdate
rollingUpdate:
maxSurge: 25%
maxUnavailable: 25%
revisionHistoryLimit: 10
progressDeadlineSeconds: 600
paused: falseoc create -f deployment.yamlFind the name of the pod and RSH into it
oc get po
oc rsh <nettest pod>
# Once within the pod, run a curl against <svc-name>.<project>.svc.clusterset.local:8080

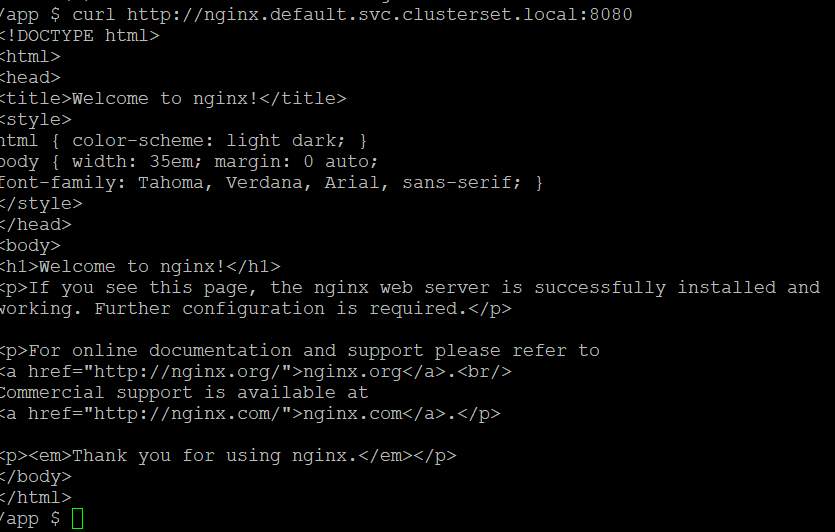
We are seeing output so this proves that network connectivity and DNS resolutions works across this ClusterSet
Changing VolSync to use ClusterIP Instead of LoadBalancer
In the previous VolSync article, I used a LoadBalancer (MetalLb) resource to expose the replicationDestionationResource. I am now going to change this to use ClusterIP and expose the service across the ClusterSets
- On spoke2, let's look at the replicationDestination service. In my cluster, the project is called myopenshiftblog
oc project myopenshiftblog
oc get svc
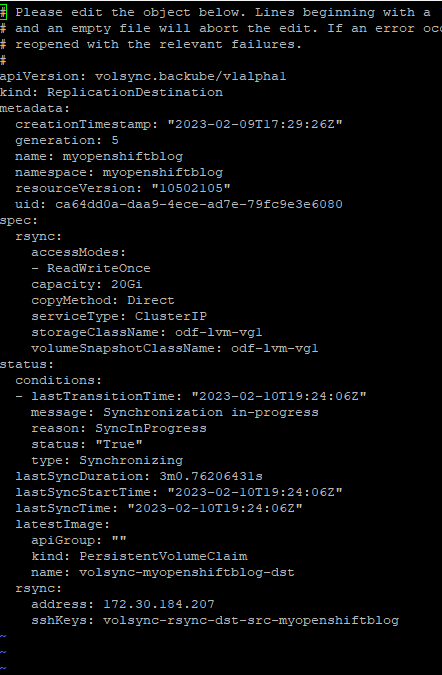
Since this is type LoadBalancer, the replicationDestinationResource will need to be changed to use serviceType: ClusterIP
# Get appropriate replicationDestination if there is more than one
oc get replicationDestination
oc edit replicationDestination myopenshiftblog
Since this is type LoadBalancer, the replicationDestinationResource will need to be changed to use serviceType: ClusterIP
2. Run the following command. Specify the namespace and servicename of the volsync service.
# Get the svc name
oc get svc
subctl export service --namespace myopenshiftblog volsync-rsync-dst-myopenshiftblog
There should be another svc exposed in addition to the regular svc
oc get svc
A 241.1.255.252 GlobalNetIP was assigned
3. Let's test connectivity from spoke1 cluster to this resource
Assuming you still have the nettest pod deployed, run the following from RSH prompt
dig volsync-rsync-dst-myopenshiftblog.myopenshiftblog.svc.clusterset.local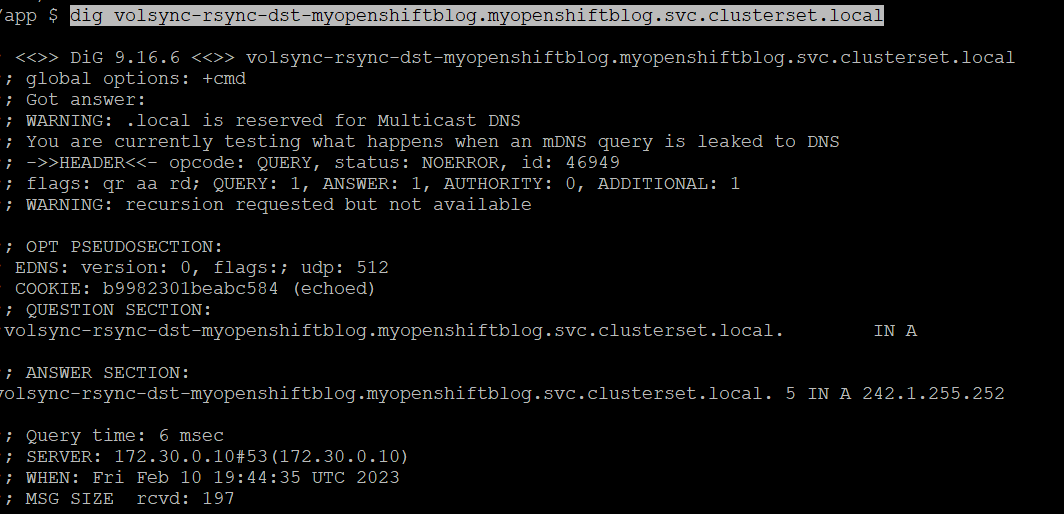
See that the address now resolves.
4. On spoke1, let's change our replicationSource on spoke1 cluster to point to the new DNS-based ClusterSet resource (volsync-rsync-dst-myopenshiftblog.myopenshiftblog.svc.clusterset.local). Edit the rsync.Address spec
oc project myopenshiftblog
oc edit replicationsource myopenshiftblog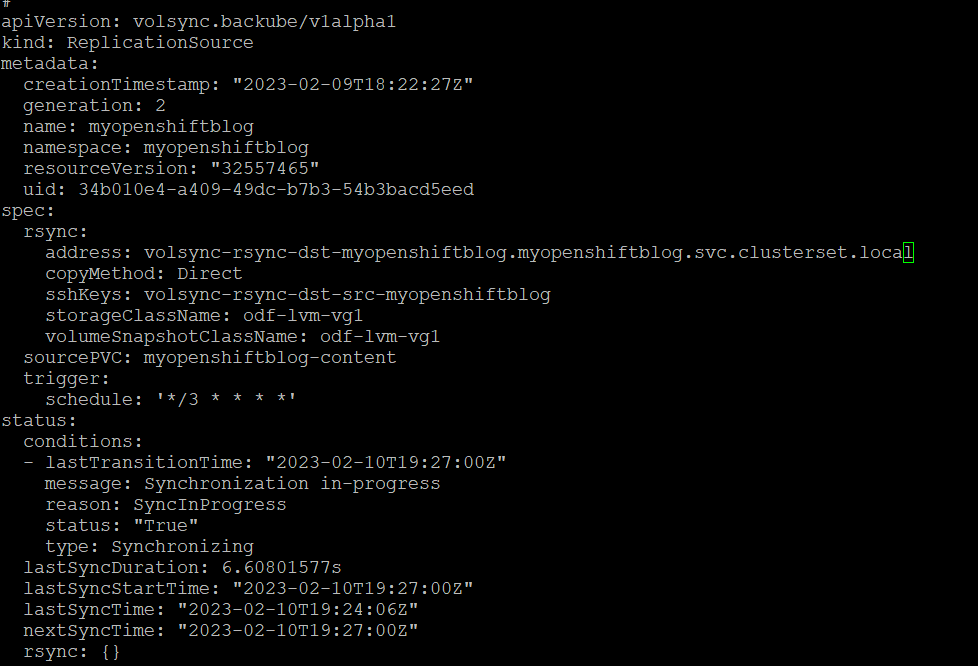
5. Since we set this cronjob to every 3 minutes, it should run.
oc get replicationsource myopenshiftblog
This is showing a successful sync based on the new DNS name (based off of submariner/Globalnet)
I hope you enjoyed this article. More to come soon.