
Moving Ghost Blog Sites to OCP
Introduction
I will use this article to do a little bit of self-promotion as well as work you through an exercise on converting a standard container-based Ghost blog to run on OCP. This process is fairly easy and may be simple for the more seasoned OCP developers, but it is a good exercise to go through nonetheless.
I had previously used the managed offering from Ghost.org (for three sites including this one) and I highly recommend them. Their support staff is very responsive and they use Cloudflare CDN for caching/redundancy, etc.
Since I work as an Openshift Tiger Team member, I wanted to start using the platform (OCP) daily in my own hobby sites to have a mindset similar to any company that uses OCP for critical operations. I'm using the Single-node installer for OCP (version 4.9.6) for the cluster that I am running now on my personal server. Having my personal sites on OCP also helps me come up with more ideas on doing some blogs on best practices, day 2 operations, etc based on what I'm seeing from a more personal standpoint. Most of the content I develop is based on comments I receive from customers. This exercise gives me a different point-of-view on the OCP platform (my own).
I run this site (myopenshiftblog.com) as well as two other blogging sites using Ghost. One of my other sites is myculinaryblog.com and drivetester.us.
Myculinaryblog is self-explanatory and highlights some recipes I've developed. I love cooking and take the same technical/methodical thinking in cooking as I do with my regular job.
Drivetester is my blogging site for drive-testing wireless carriers and doing technical comparisons on performance, etc. For Drivetester, I have an Elasticsearch instance that I use for analyzing/ plotting data and some PHP scripts that allow me to upload reports from my cellphone to my webserver. I will eventually move the Elasticsearch functions and the PHP stuff over to OCP as well but will concentrate on the Ghost blog content for this article.
How to run Ghost Blog in a Container
See the following link on how to run Ghost in a container. For this article, I will be moving my Drivetester blog over to OCP.
Here is the command I would run on regular Docker to start the site based on my own Docker-hosted version of this site (not the managed Ghost offering). I went through 3 phases with each of my sites. The first was using Ghost managed, the second was using my own Docker, and the third is hosting on my OCP (that is this article).
docker run -d --name drivetester -v /home/drivetester/ghost:/var/lib/ghost/content -e url=http://drivetester.us -p 3002:2368 ghostLet me explain a little about what is happening with this command. This will help us with bringing the container over to OCP as well.
- I'm running the docker run command in detached manner (background) (docker run -d).
2. The /home/drivetester/ghost directory on my host operating system is getting mapped to /var/lib/ghost/content on my container. This directory has some of the Ghost settings, themes, images, and other content.
Here is a high-level view of the contents of this directory.

The images.tar.gz was used for moving the Ghost image files over to the persistent volume that was created for OCP (more on that later). We could simply move this whole directory over as well but I'm going to use the import/export wizard from the Ghost management console in this case.
3. An environment variable (url=http://drivetester.us) is set so that any links generated within Ghost itself don't point to localhost:2368 (localhost:2368 is how the site site can be addressed from the host operating system but isn't reachable on the Internet).
4. TCP port 2368 is the default port that Ghost uses inside the container. This is being mapped to port 3002 on my host operating system. I selected ports 3001-3003 for each of my sites (no particular reason). A URL-rewrite rule and HAPROXY configuration was used to do the header translation (www.drivetester.us) to direct to the correct port on the host operating system.
Backing up Content on Self-Hosted Docker to Move to OCP
I am exporting and importing the content for this Ghost site following a few methods. Most of the settings get imported correctly by using the tool inside of the Ghost management console but there are a few settings that don't work just yet. There are some changes I need to do directly from the Ghost management console (after the import) to change the theme. Lastly, I had to manually copy the images directory over to the persistent volume manually. I will show these steps in the Youtube video and explain.
- I go to http://drivetester.us/ghost to go to the Ghost management console.
- Once I login, I go to the gear icon (lower-left corner) and go to the "Labs" section. I consider this some tools that are still being tested but it works fairly well. From here, I use the "Export Content" option. This creates a JSON file which will be saved locally and imported once the OCP version of the site is live.
3. From my Docker-hosted version of the site, I will tar-up the contents of my /home/drivetester/ghost directory (/var/lib/ghost/content on container). I found that I only needed to untar the images directory but it doesn't hurt to have the whole directory.
tar cvzpf <filename.tar.gz> ghost/Setting up OCP for drivetester.us
- Inside OCP, I first create a project/namespace called drivetester
- Once the project/namespace is created, I go to the developer perspective to add an application.
- Click on the + icon (upper-right corner)
- Image name from external registry is just called "ghost"
- I use the standard Openshift icon
- I use "drivetester" for both my name and application.
- Generate a "Deployment" resource.
- I expose a route called drivetester.us. Later on, we will also great an additional route called www.drivetester.us. This lets the OCP reverse-proxy look at http-header and send the traffic to the correct application/site. The default port for Ghost is 2368 (select that). I do non-secure (non-TLS) since Cloudflare is fronting my application with certificates they generated for me. Optionally, you can use your own certs.
- Shortly, the application should show up in the topology view. It is currently a skeleton install of Ghost (none of the content we had is on there yet).
10. Let's add a route for www.drivetester.us. The settings will be the same as the other route we created (drivetester.us) except for the URL.
There are a couple of ways, we can handle things from here. We can create another FQDN for the route based on the app domain (drivetester.apps.<clustername>.<basedomain> or I can simply change my DNS settings to point to www.drivetester.us and drivetester.us to the OCP route IP. I decided to have a little bit of downtime while I moved the site so just moved my DNS.
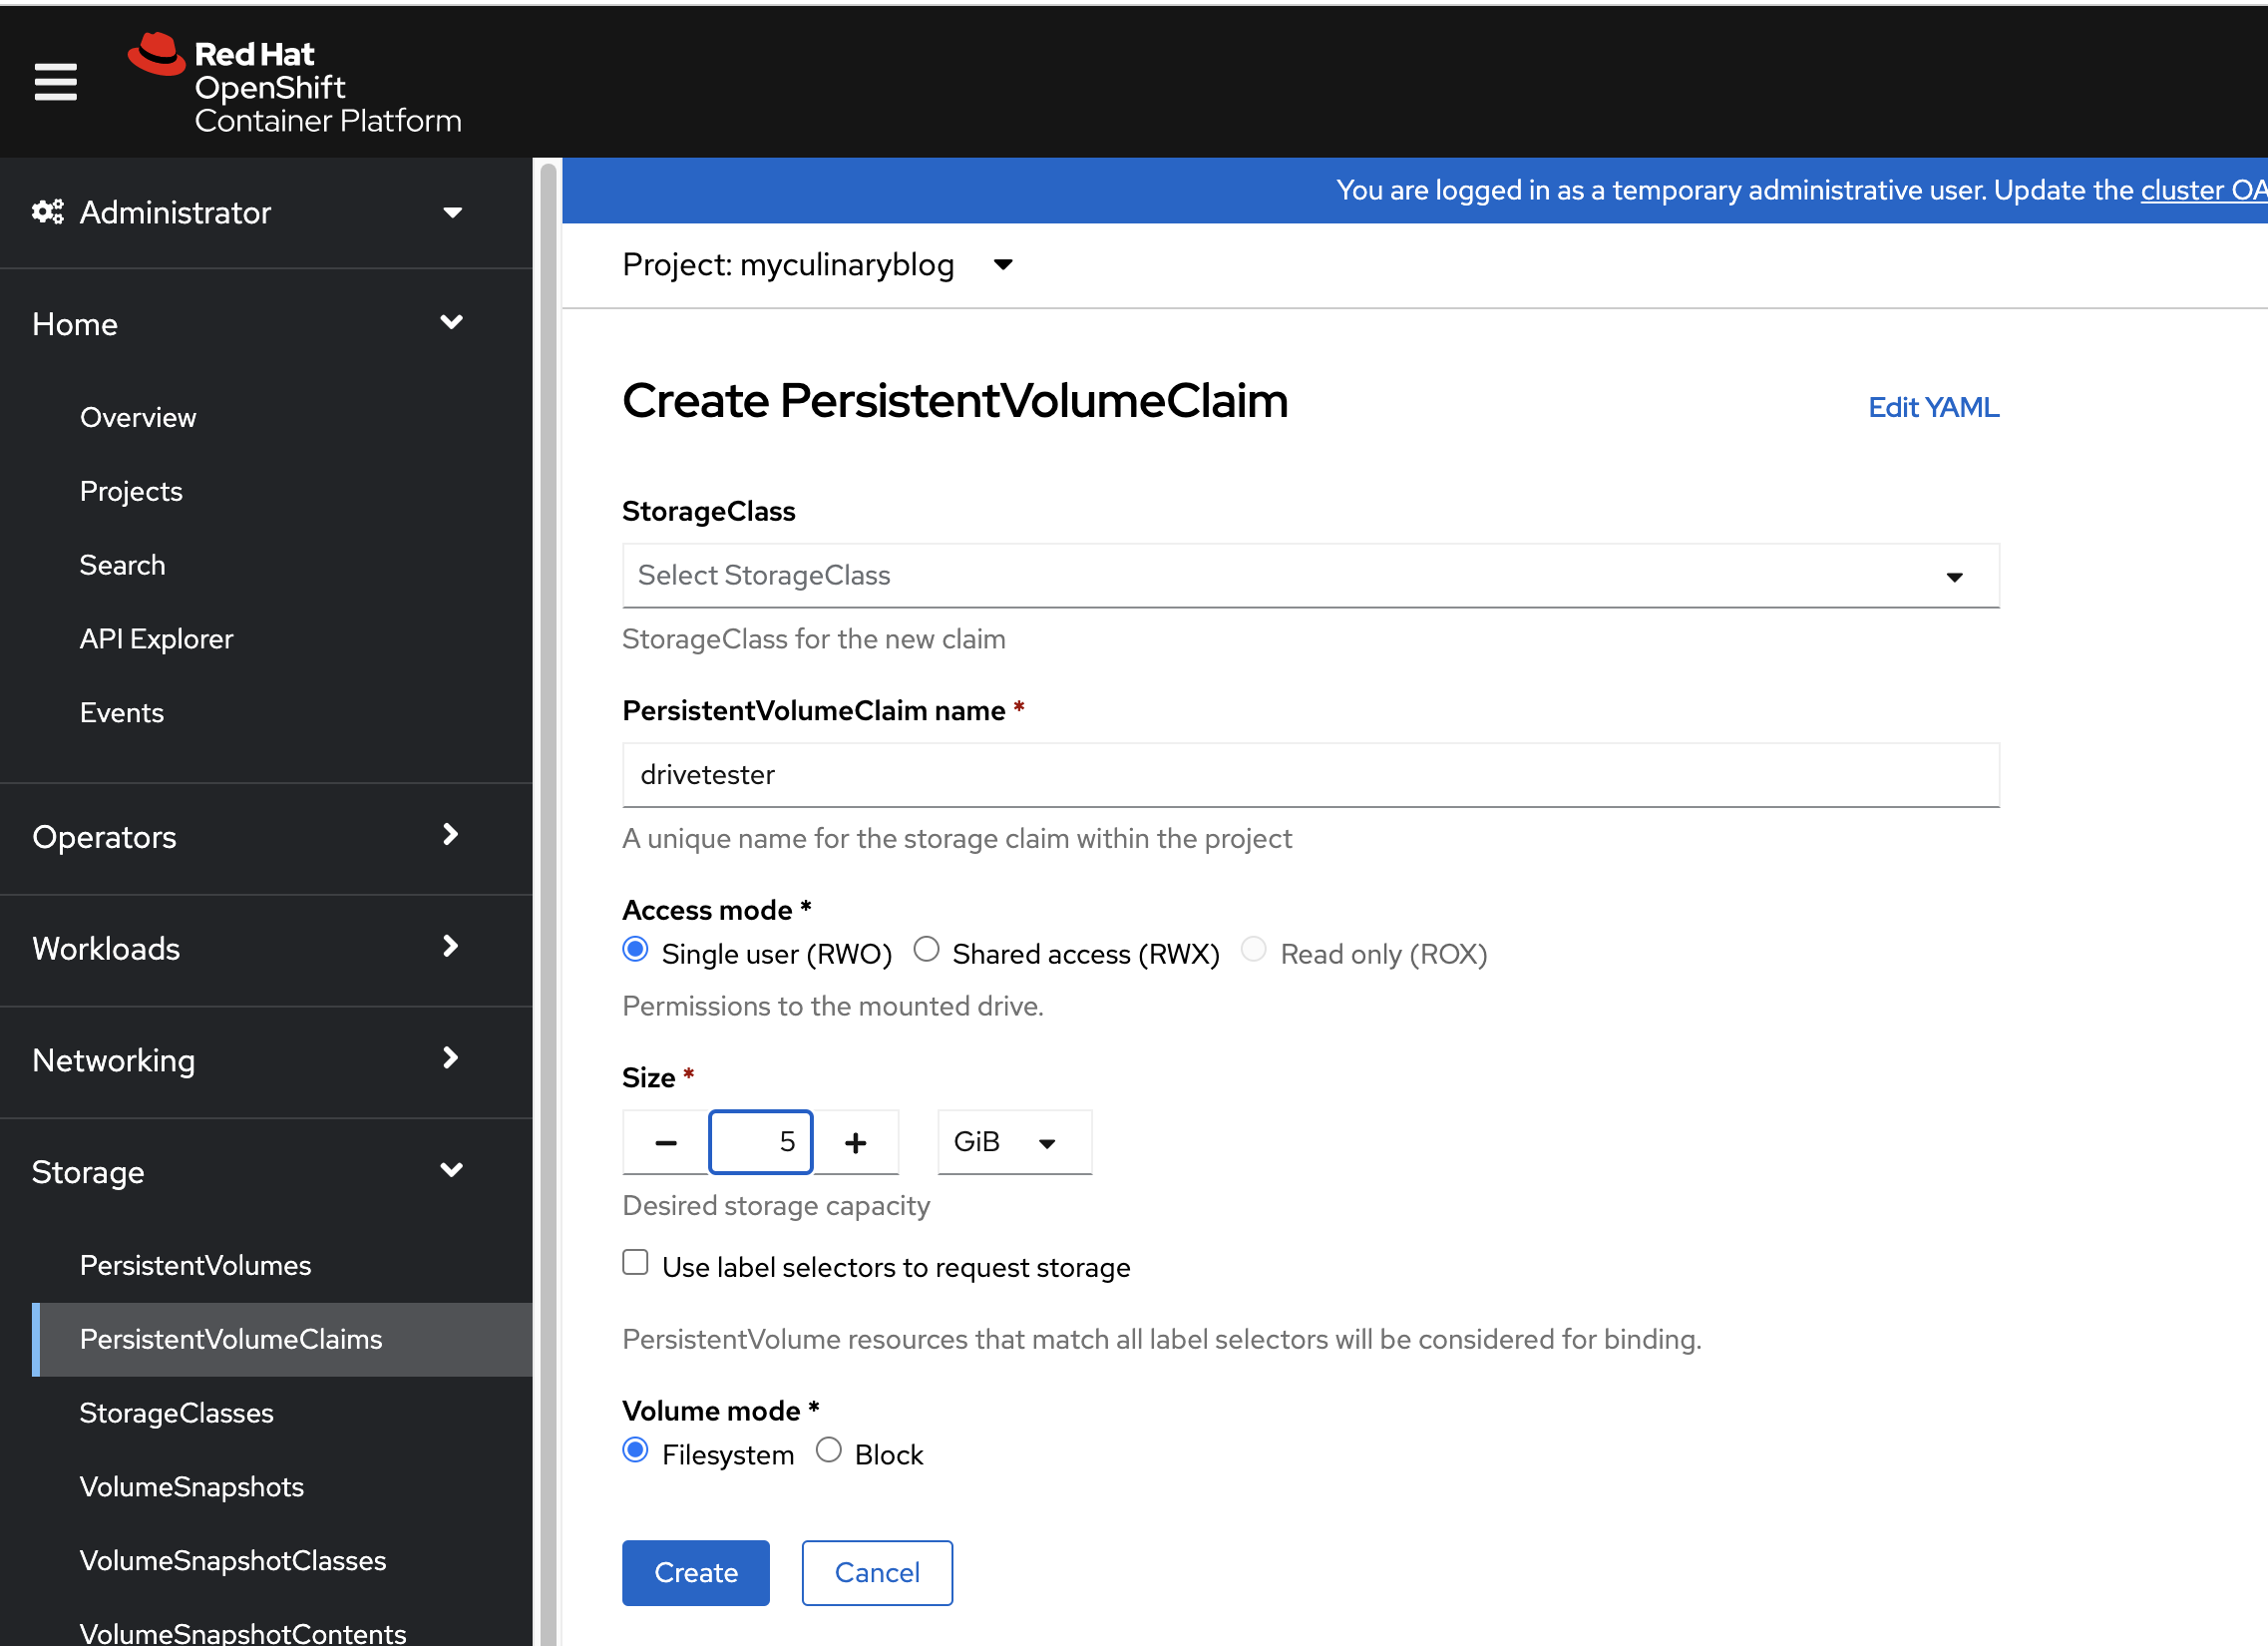
11. I wanted to have persistent storage for this site so I created an NFS server on the internal network. For this, I needed to create a PV (persistent volume), PVC (persistent volume claim). Creating an NFS server is beyond the scope of this document but any file-based storage will work. Here is a sample PV and PVC.
apiVersion: v1
kind: PersistentVolume
metadata:
  name: drivetester
spec:
  capacity:
    storage: 5Gi
  accessModes:
    - ReadWriteOnce
  persistentVolumeReclaimPolicy: Retain
  nfs:
    path: /nfs/drivetester
    server: 10.0.200.3
I create the PVC object using the web console (Administrator Perspective --> Storage --> Persistent Volume Claims). Make these settings match the PV that we created previously.
12. Lastly, I needed to make two changes to the Deployment resource to use a persistent volume for the /var/lib/ghost/content directory and also add the environment variable (url=http://drivetester.us)
To add the PVC to the deployment, go to Administrator Perspective --> Workloads -->Deployment and edit the YAML. Here are the changes I made.
Under spec, volumes, remove the emptyDir and replace with the following:
    spec:
      volumes:
        - name: drivetester-1
          persistentVolumeClaim:
            claimName: drivetester
If /var/lib/ghost/content was not already mounted as an EmptyDir, we could have simply used the "Add Storage" option from the deployment screen.
The Pod will redeploy and attach to the persistent volume. To verify, go to Storage and verify that PVC and PV are bound.
To add the environment variable (url=http://drivetester.us), go to Workloads --> Deployment and click on drivetester (for me). Go to Environment tab and add single value (url=http://drivetester.us). The pod will redeploy one last time.
Importing Content into OCP
At this point, I have moved my DNS (drivetester.us) to the OCP router IP. The last steps are to do an import of the JSON file we created earlier, reapplying the correct theme, and most likely copying the images directory from the backup we did from the old host system earlier.
When the site created in OCP, there is only the default content that Ghost provides (not my content)
- I need to login to http://drivetester.us/ghost to do some initial setup (IE: creating my login user account)
- Once I add my user account, I will go to the gear icon, Labs, and import the JSON file we downloaded earlier. There may be a few warnings about duplicate user accounts (that is ok). The content of the site will be imported but it doesn't have the correct theme and there are some broken links for the images. Let's fix that.
- The theme I used on my Docker-hosted version of the site was "Alto". I will change to that.
- In the associated video (below) you will see that there are some extra posts that Ghost puts on sites by default. I will need to do some cleanup of that but another issue you will see is that my images are broken-links. The last thing I need to do is copy the entire images directory from the tar file I created earlier to the /nfs/drivetester directory on the NFS server. The import/export doesn't take care of this part.
- Once I changed the user/group permissions on the files in the images directory, there were no more broken links.
As you can see, the Openshift Web Console is very intuitive. Between the Developer and Administrative perspective, you can do a lot of things. Even if you do not understand OCP or Kubernetes, there are only a few things you need to do to move from a Docker container to OCP.
I hope you enjoyed this article. Much more to come.